SlotForum banner

New track

82K views 239 replies 61 participants last post by  Arerrac  
#1 ·
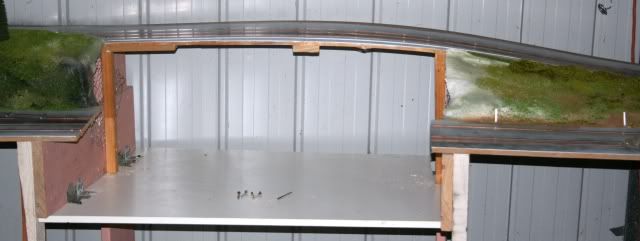
Spent three days cleaning out my shed. Finally making a track that will make for great racing as well as another track that I can do some scenery with. The bigger track is finished but still needs to be hoisted to the ceiling cavity. In the meantime I need a track to distract the boys here so a nice little three lane deal should do fine.

I'll post update photos as progress is made and answer any questions.

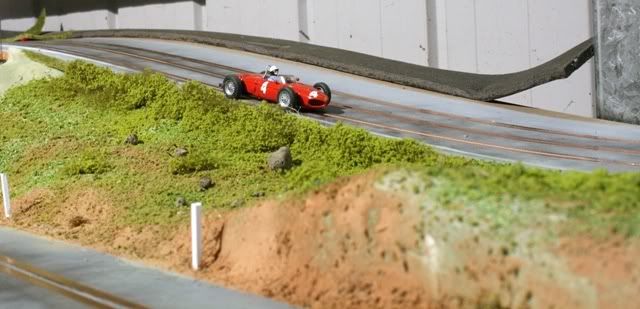
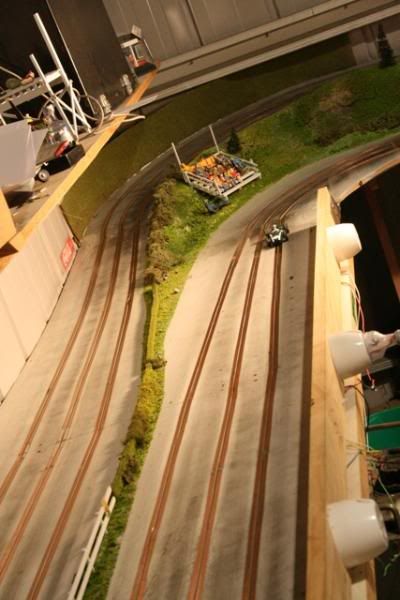
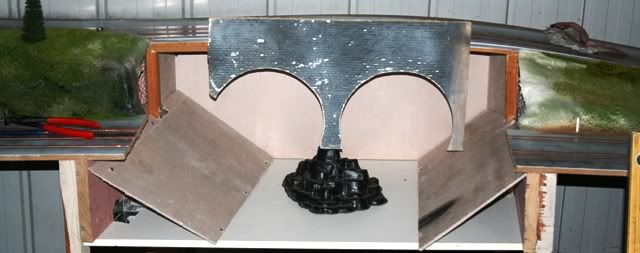
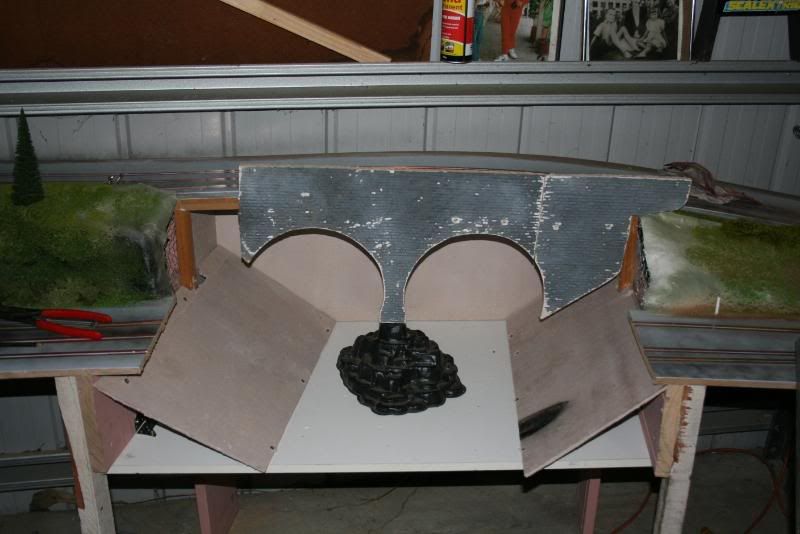
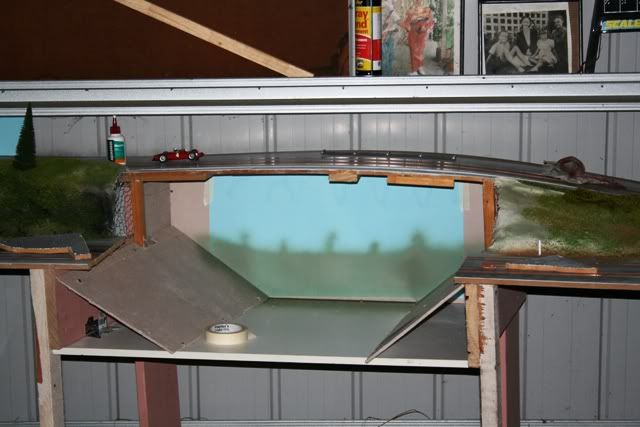
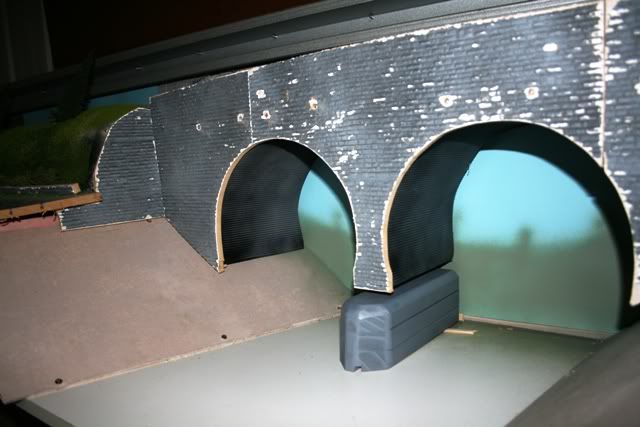
The first comment I'll make is the track hills were made using small gauge bird-wire with chopped strand fibre-glass mat laid over the top then a flexible rubber based waterproofing compound placed over the top of the mat. Quick simple, non-edible and permanently flexible.

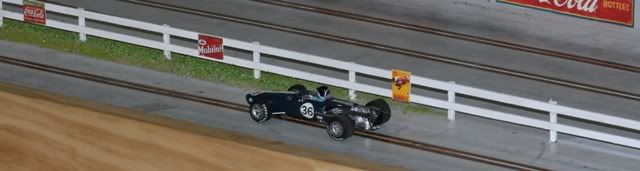
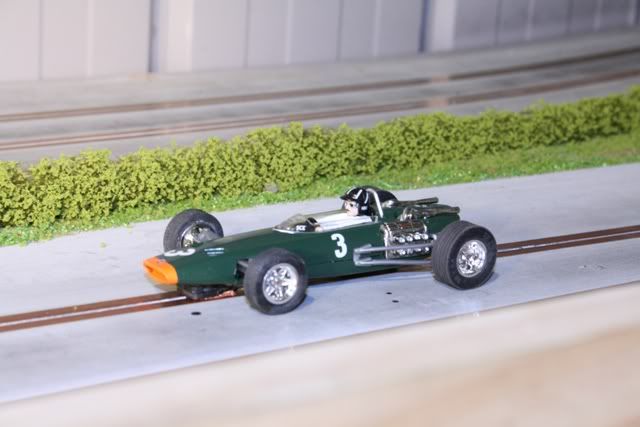
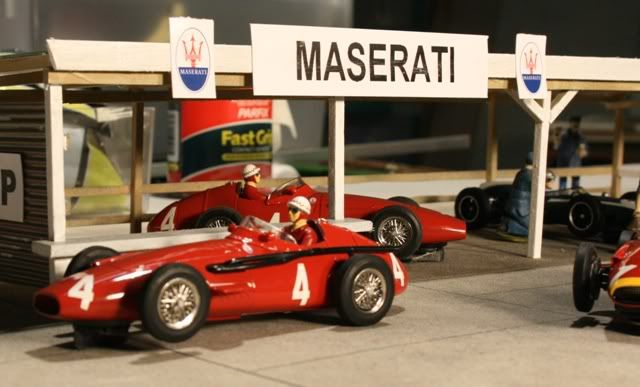
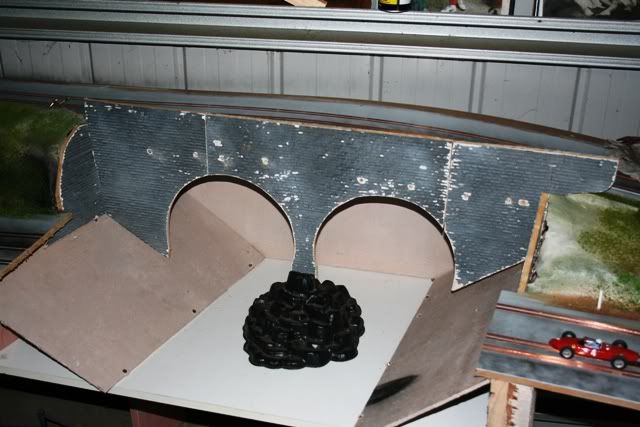
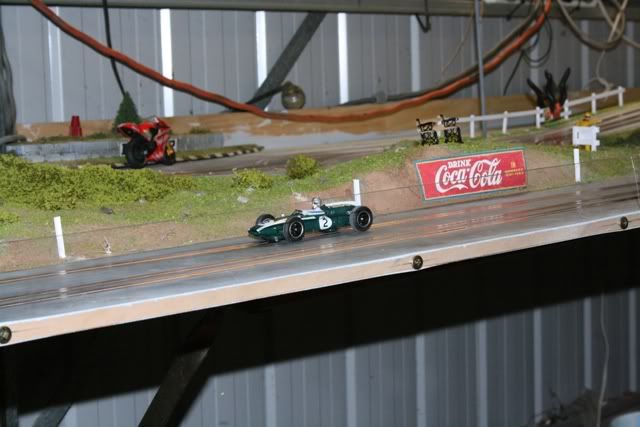
Also note, I placed some clear Perspex strips around the track edge, so my 5 yr old son can see the cars coming down the hill. His first complaint when the track had a timber border. The clear Perspex can be seen just above the Cooper. Not my idea, saw someone do it here and I can recommend it. Also think it adds some depth to a layout.

Image


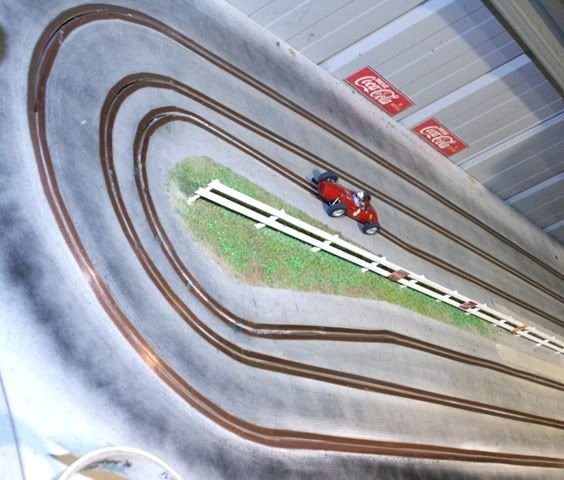
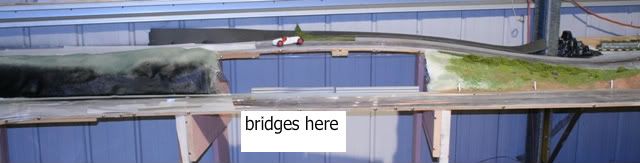
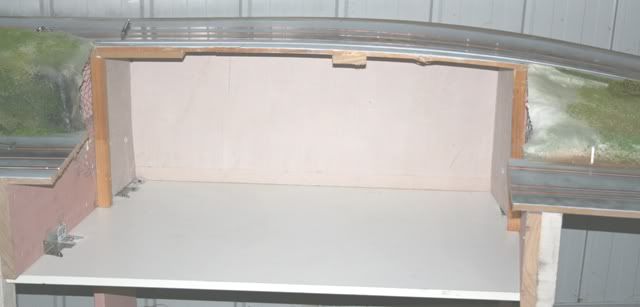
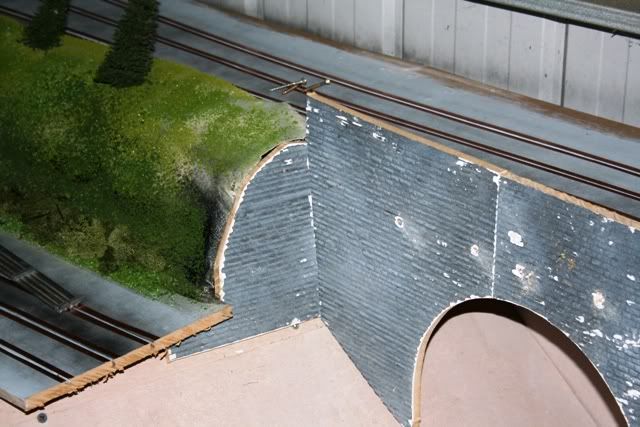
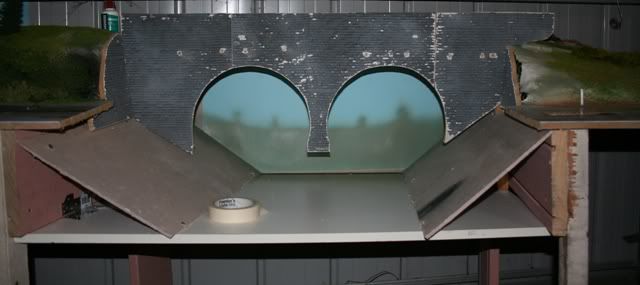
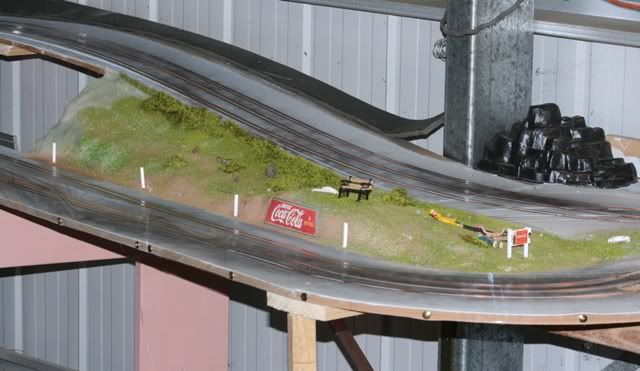
The track has only really one level area and everywhere is is uphill and downdale.

Image


Hopefully the photos work!

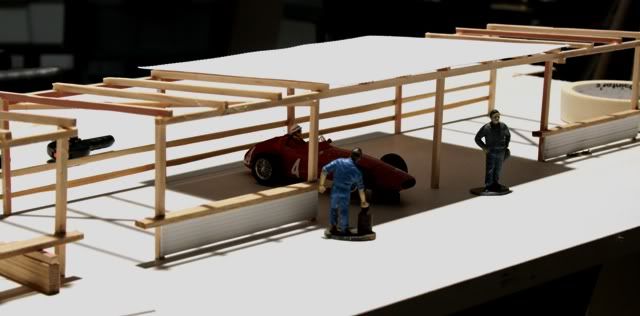
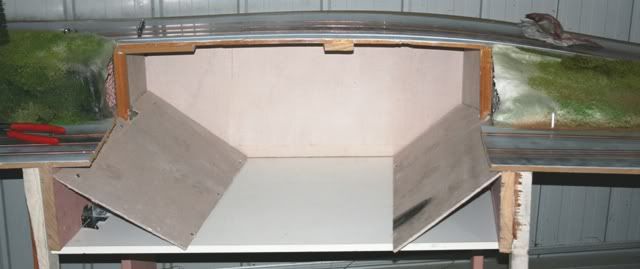
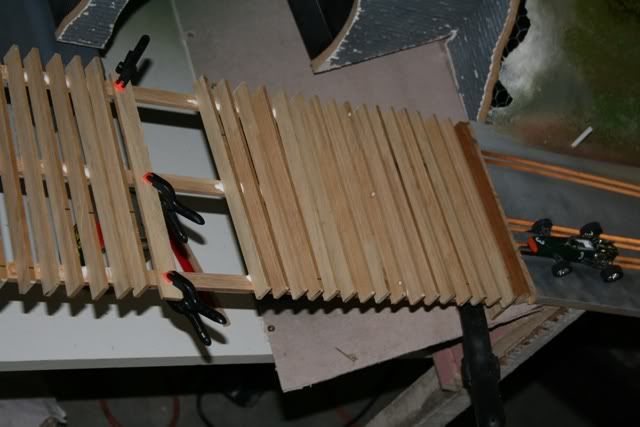
New scale timber fence pit wall.

Image
 
#6 ·
That's a nice looking little track. I imagine your son loves driving round that.

I notice the screws holding the perspex have split the MDF. Whilst this is not a problem usually, it does look a bit ugly. The secret is to clamp the MDF before you drill it and use a drill only marginally smaller than the full diameter of the screw thread. Use longish screws so that they get as much grip as possible within the hole and longer screws also support the perspex better if someone leans against it.

To rectify the existing problem you could try sqirting some woodglue down the hole, clamping and re-drilling, if it bothers you as much as it would me.
Image


I've just noticed all the smileys have been jumbled up again!
Image
 
#8 ·
Thanks guys,
Yes, Knoath the whole track is worked out in 1:32 scale. The fence is scratch built. Worked on 2 fence rails each of about 180mm (in 32scale) and posts of 150 x 150mm. I figured on making the fence the sort of size as that of the old banked Brooklands racetrack after I found a picture of the aftermath of an off track excursion. Most of the timber used in the little pit wall fence was ripped down through a 10 inch bench saw which means getting your fingers close to the blade. About 4 to 5mm close so you have to keep your wits about you. Luckily these days the saws spin as if running on air so not as bad as the olden days..which I'm sorry to say I can remember. Here is a little more of the fence. Still some work to do in this area.

Image


…. And Graham is right about the split mdf. Hardly the work of a qualified Carpenter and Joiner. I do intend to fix that Graham. But in my defence I was doing the Perspex whilst the three boys were whizzing some fairly valuable cars by my finger tips, so the faster I got it happening…

Really happy with how this next section turned out. A fast run downhill and a quick left right. You can take it flat out. The photo doesn't give it enough credit it really drops down fast.

Image
 
#10 ·
Finally a chance to get a bit more work done on the track.

Still undecided on the bridges and retaining wall section which can be seen as the "hole' with the small bird wire in it. But all that will come later.

A less amount of work to get an old track looking like an ....old track, without the kerbing and modern pit facilities, etc,etc.

So a little grandstand, some 1940ish signage, and of course some scenery.

Image


Image


Signs were downloaded from old photos on the web.

Image


The photo above is the grandstand unpainted and here underneath, undercoated.

Image
 
#13 ·
This is the best I can do in regards attempting to get a photo of the track .. So here goes...

The start finish straight and future pits..This section about 3.6metres long.

Image


The back end of the circuit. The length of this section is a tad over 6 metres long.

Image


If you use the grandstand as a reference point, then you'll get a good look and idea of how the track is laid out.
The back section is also very fast.
Have also been reading old Grand prix books and the era I'm chasing is a time when very little, if any, armco barrier was being ued. Mostly hedges were the best attempt anyone made in an attempt to contain a crashing race car. These I hope to run right around the track, at least where they are needed.

Image


Have also found some interesting signage for the track..

Image


Close up anyone know much about this race?

Image
 
#15 ·
Finished the hedges. Looking good now. Have enquired or maybe acquired some additional help with this detailing from some railway mates who insisted on putting their knitting down for a moment and giving me a hand in the next couple of weeks..

Image


Next of course is the pit wall. This photo is of Mr Ferrari sitting on a pit wall. Exactly the era I'm looking for.

Image


Might I also take this opportunity to ask some of the Europeons for a good photo, should one exist , of the classic pit wall please. Especially some from the Goodwood circuit if thats possible.

Anywho.. , back to the next project/

Framed up and ready to go!( nearly)

Image


and of course the overhead view. All material for the building is handmade with real timber and a really sharp saw blade being used to trim it down
Figured the posts were 100 x 100 mm. Not a high ceiling, and some small front kickboards on it.

Image
 
#16 ·
I got some time today to get some more work done on the Pits. I've built 2 the same so far. Just how Mr. ferrari would like them. I'm tossing up as to whether to get the cars to drive out from under them or to have the cars just stop in front of them. I think the latter is more realistic. So still one or two things to do like the roof and some downpipes etc..
painting of course to follow one pit roadway is finished..
Image
 
#18 ·
Thanks.

Having trouble finding any more photos than the one I had. Judging from the photo in the book, I can say for sure most of the roof timber sizes were too small and would have eventually given way. I also assume sometimes people would have climbed on them as well. so I guess that was before stress gradings.

Once these building are complete, it will be time for the bridges. So if anyone can point me to the fake water thingy, that would be much appreciated/

Image
 
#21 ·
Plenty of rain around today. Plenty of time for the work to continue on the track. Time to start the bridges. Firstly the stone bridge at the back of the layout to give the impression of a more modern bridge, and then in front, a timber plank and pylon bridge with a newish asphalt road laid over the top and a footpath and handrail on one side. Typically in a moment which best defines me as a planner with vision, I've forgotten to allow any space to do this on the side which would best suit the layout.
Image


Both bridges will look as if they have water running underneath. I've considered having a real running water stream underneath with a pump system generating the water flow. Given that I can water-proof where ever the water might get to, that wont be a problem. But I'm guessing that will look a little fake and right now I'm probably starting to lean more towards using a furniture polish layered water pond stream thing. Which I've never done..
Image
!! Besides I have enough little hands around here that will play in the water more than they would use the cars so... my mind is leaning towards a practical solution that doesn't involve a slot car track being used as a water theme park.

so here goes, a bank of photos of the part finished bridge section...everyone feel free to give me any advice about the water concept and dont be afraid to drop the odd idea in anywhere.

Heres the track
Image


Image


Image


Image


Image


Image


Image


Image


Image


Image
 
#22 · (Edited by Moderator)
What a super bridge! I love it.

I'm going to try using dappled glass for the bottom of my valley. I'm not sure whether to paint the river base in various shades of green, blue and brown, or use something like cling film and a small fan to 'motivate' it. On the other hand several layers of plain glass under the dappled might have the right effect. You could even put real water under in a sealed box and 'motivate' that
Image
 
#23 ·
Heres one thing we haven't mentioned yet Graham. Master 9 wandered down to the shed, took one look at the "gap" and said, Cool! A JUMP!!

The water thing appears to be a sort of trial and error thing. Some things work well for some and then exactly the same proceedure appears to not work for others. So some experimentation appears to be the way to go. I never thought of a ripple effect. Thanks very much. It sounds difficult and should be a complete pain and therein lies the challenge that gets me every time. If I had modelled the track on an Australian theme, I could have used a dry creek bed complete with dust.

Thanks to Doug as well for sorting out my last post. Hit a button twice somewhere and could not edit my post. Where would we be without the mod's.

If anyone was wondering how to get so many stones on a wall in a hurry, I bought a plastic stone square at the model shop, filled the back of it with plaster and just made some casts on a piece of mdf board not forgetting to align the courses of stones and just cut out the shapes I needed. It was quite simple and the MDF was about the right size for a stone wall thickness. The plaster I thought would give me a crumble type effect.

Image
 
#24 ·
Image


Spent the day doing sport with kids so not much progress. The water under the bridge is still an issue but not todays problem. I have one or two things already brewing in the shed to see whether or not they dry clear enough to pass for water. We'll see.I prepared the two arches in the bridge to take the arch supports. I'm sure these have proper names but I don't know what they are. They are made from cardboard and should look ok when finished. They wont be the feature of the bridge but it will look a little unfinished if something doesn't fill in the hole underneath.

The next problem is the timber bridge. It will have to be made out of one piece of MDF and shaped up.
This way I can put the supports underneath and keep it in one piece, no doubt it will have to come in and out a few times before I'm finished.

The bridge below is an old one from a rally layout I did years ago. As you can see, one side had to put up with a few handrail intrusions. Still, it allowed me to get to see what kind of room I had to work with.

Image
 
#25 ·
More work done today. I took advantage of having tools scattered all over the shed to keep on pumping in the work. Started on the timber bridge. Thought I would try it as an timber planked bridge first. That way if I dont like it I can always lower it to the same thickness as whatever I replace the roadway surface with. Ripped down the joist on the saw and set out the joist on three bearers.

Image


These were made a little extra deep in case I need to adjust the slot. They are a little out of scale but its for strength in case someone leans on it. Which will no doubt happen. The bridge supports are easy enough so I'll build them later. The trick for the moment was getting the groove/ slot in the right spot. It was more fiddly than I thought... I ended up using the planking as the edge of the slot.

Image


Image


Then I had to run a grinder with a cutting wheel down the slot to get the depth just right as well as undercut/bevel the slot because the guide caught on every joist as the car moved along the bridge... and for the slightest little reason if the joist stuck out into the slot cavity it would only ever snap guide blade fixing off. But once I got it right I was able to use the grinder to shape up the lanes to good effect.
Now the cars fly along the bridge without even a whisper of contact with the joist. Thanks goodness.

Image


Image


Powered up and with a couple of willing volunteers to drive the cars, I took some photos. Alterior motive, if anyone can find something to brake a car on, it would be one of my kids. Happy to report.. all good
 
#26 ·
Always think of David Lawson ( if thats really his name) from here when a Brooklands idea pops into my head. At the Brooklands track in its heyday, they used corrogated iron sheets to make up fences. So I've found the perfect use for the excess roof sheets,

Image


As well as the water effect. I looked for the water effect stuff and it costs about $40.00 bucks for slightly less ml than a can of Coca-Cola. So need an alternative.

I experimented with a product called BONDCRETE. Its going ok and drying nicely but its been so wet here this weekend, nothing will dry anyway. So my patience will get a work out while I wait to see if this works. So far so good, its tacking off and I think judging by the look of the small amount I spilt on the rock while I was pouring it in, it might just work out. And you can but 5 litres of this stuff for about $20. I'm going to try to clour the next batch and get a little more organized to see how it goes.

Image


Image