For a long time I've been following the forum trying to learn how to do this and that. About time I stick my neck out!

![]()
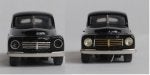
The 444 is of course the forerunner to the more wellknown 544. This is how it looked in the first version in the late 40s.
![]()
![]()
![]()
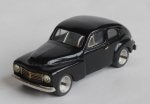
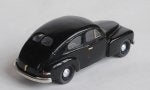
Made of balsa and lots of tamya putty. The under side view shows glued in plastc sheets around windows and wheel arches to get thin and even surfaces. All windows are flat so I will glue in 1mm styrene windows hoping to help strengthen the body.
Hope this is understandable, my english is as rusty as a volvo from the forties...
More to come.


The 444 is of course the forerunner to the more wellknown 544. This is how it looked in the first version in the late 40s.


Made of balsa and lots of tamya putty. The under side view shows glued in plastc sheets around windows and wheel arches to get thin and even surfaces. All windows are flat so I will glue in 1mm styrene windows hoping to help strengthen the body.
Hope this is understandable, my english is as rusty as a volvo from the forties...
More to come.